

How Wavy Wooden Flags Are Made: A Step‑By‑Step Look
Wavy wooden flags are one of the most eye‑catching pieces of handcrafted décor you can hang on a wall. Their dimensional flow, deep grain patterns, and bold colors create a look that feels alive. At Timbrecon Woodworks, every wavy flag is built by hand with precision, patience, and a process that brings out the natural beauty of the wood. Here’s a behind‑the‑scenes look at how these flags are made from start to finish.
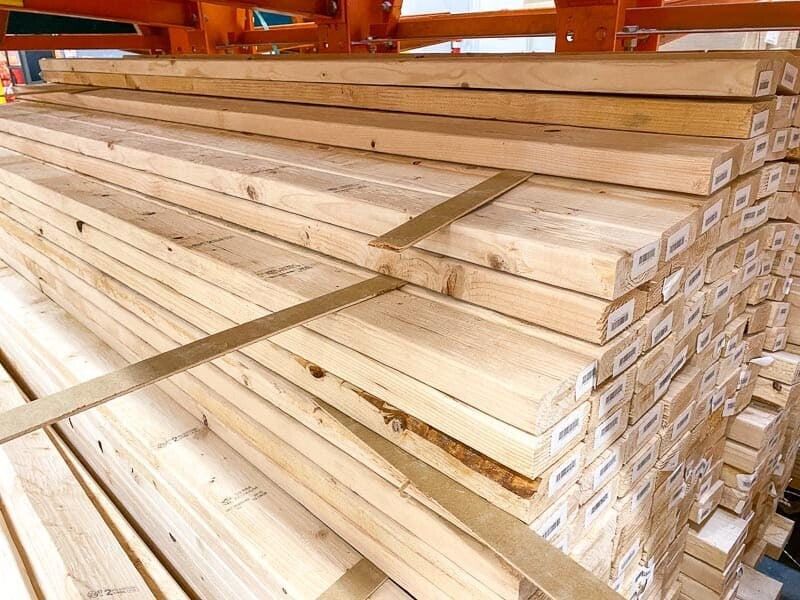
Selecting the Right Wood
Every great flag starts with choosing the right lumber. Clean, stable boards carve more smoothly, finish more evenly, and bring out the natural beauty of the waves. This step sets the foundation for the entire build.
-
Straight and stable
-
Free of major knots in critical areas
-
Thick enough to carve deep, flowing waves
Pine, poplar, and select hardwoods each offer different grain patterns and carving characteristics. The goal is to start with clean, consistent boards that will hold their shape through carving, sanding, and finishing.
If you want to see finished examples, explore our Wavy Wooden Flags collection.
Cutting and Preparing the Stripes
Each stripe is measured, cut, and shaped with precision to ensure the proportions stay true to the size ordered. The curves are traced and prepared so the waves flow naturally from one stripe to the next. This prep work creates the structure the rest of the flag depends on. The order of cutting and preparing flag pieces is as follows:
-
Cut to length
-
Alternating curves are traced onto cut pieces and numbered
- Each piece has its waves cut out with the use of a bandsaw
- Curved pieces are glued and screwed to create rough outline of flag and clamped till dry
- This prep work ensures the waves flow naturally from stripe to stripe once assembled
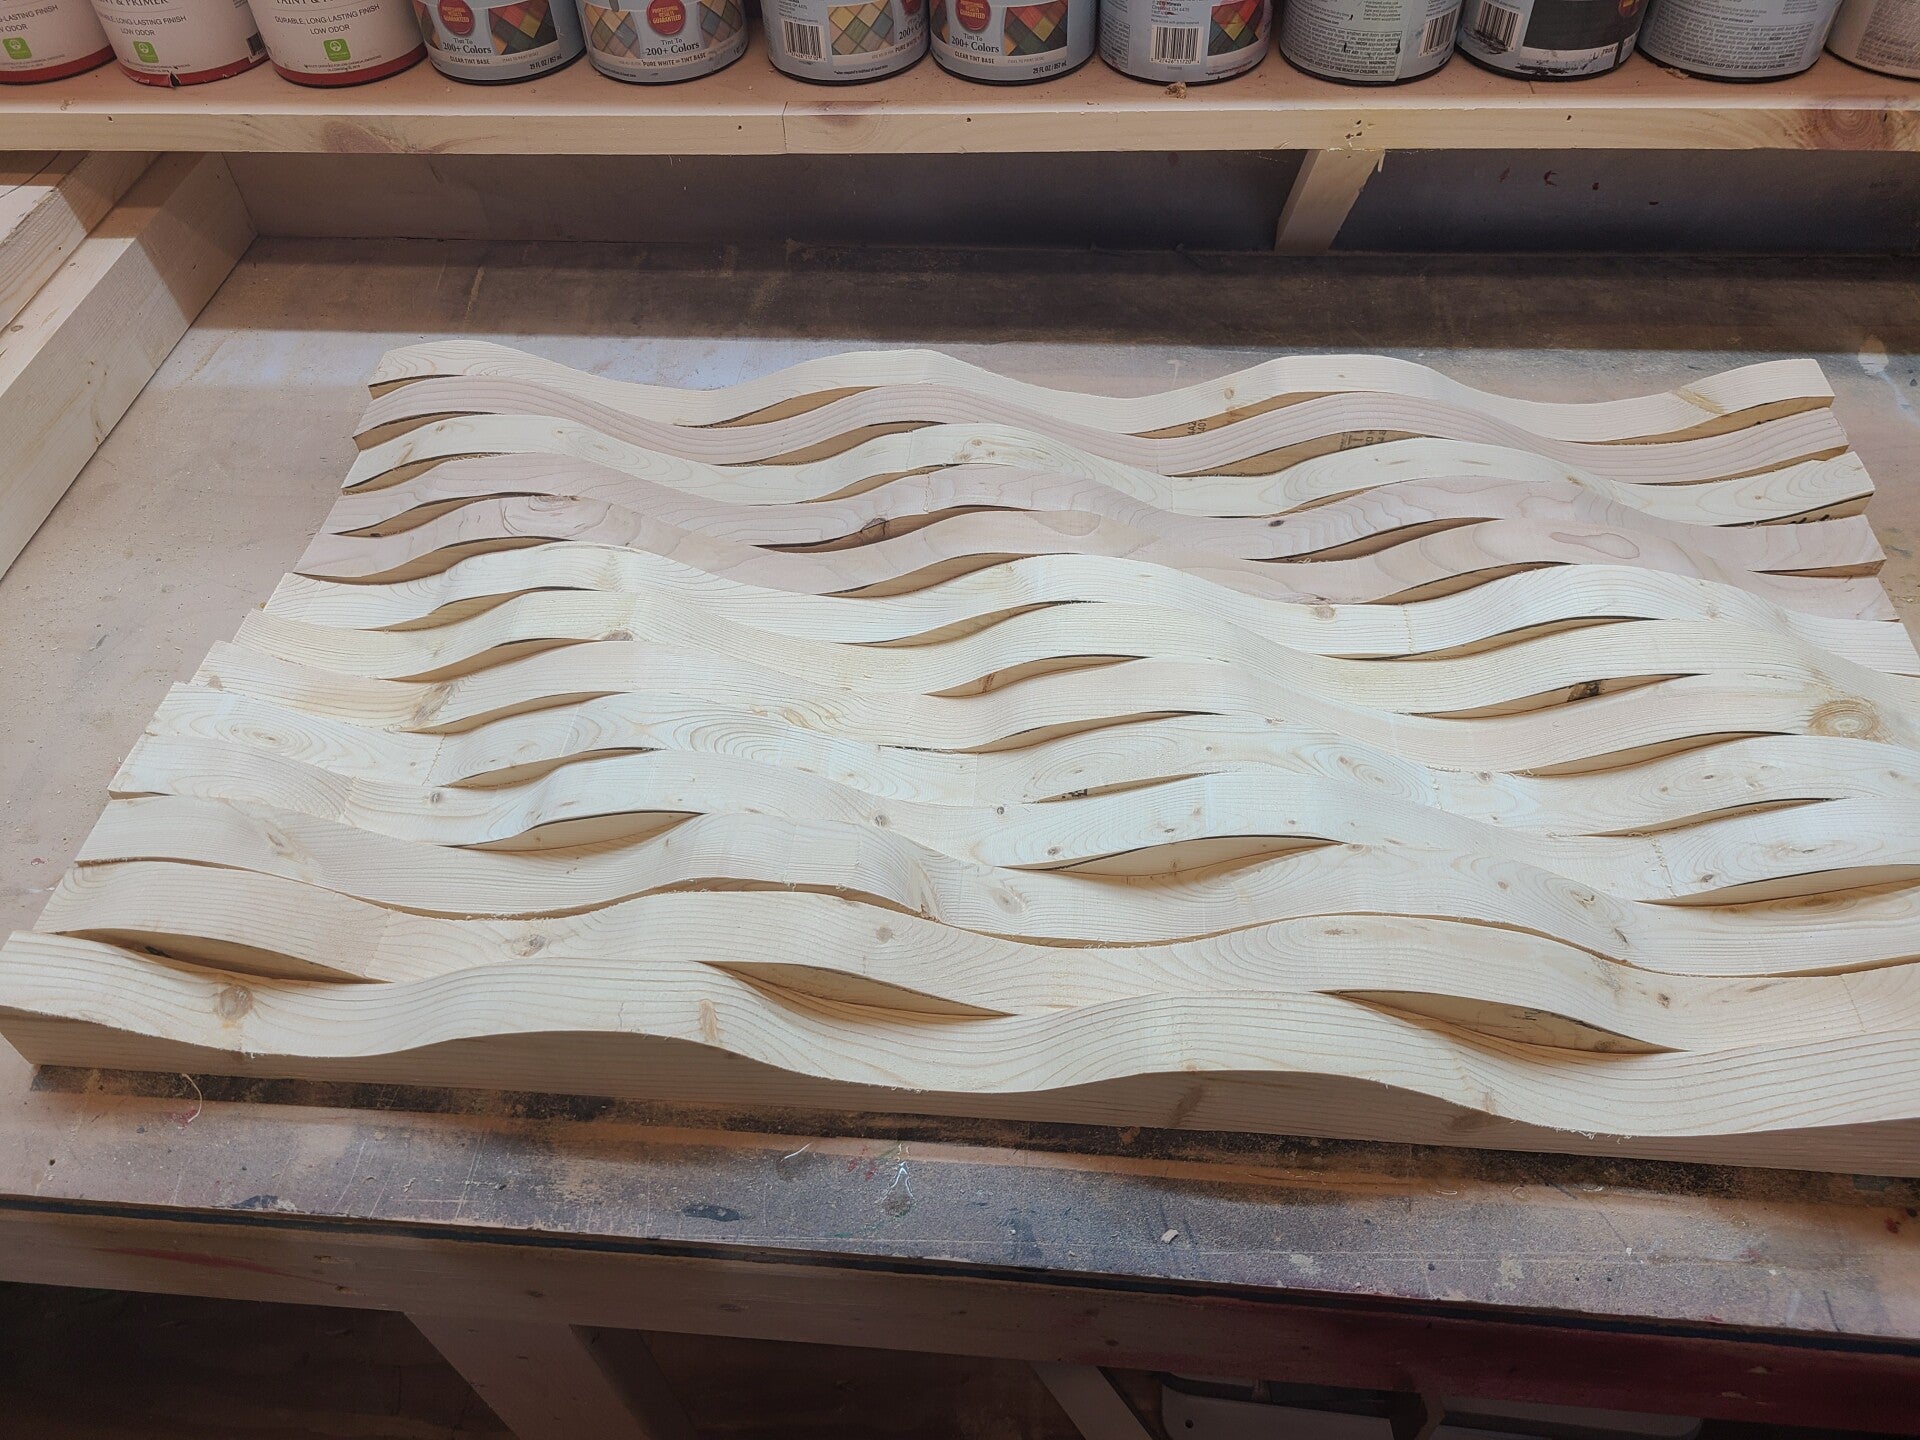
Hand‑Carving the Signature Waves
This is where the magic happens.
The assembled rough flag is carved to create the signature flowing motion of a wavy flag. Using a combination of grinders, carving wheels, and shaping tools, the wood is sculpted into smooth, rolling contours.
The goal is to create:
-
Create natural movement and depth that makes the flag feel alive, giving each stripe a flowing, dimensional look you can’t achieve with flat boards or CNC cuts
-
Highlight the wood grain by shaping the surface so light catches the highs and lows, enhancing contrast, texture, and visual richness
-
Give every flag a unique, handcrafted identity, since no two sets of waves are ever identical — each piece carries the maker’s touch
-
Build a premium, sculpted foundation that elevates the torching, sanding, and finishing stages, allowing the final gloss to pool and reflect like real waves

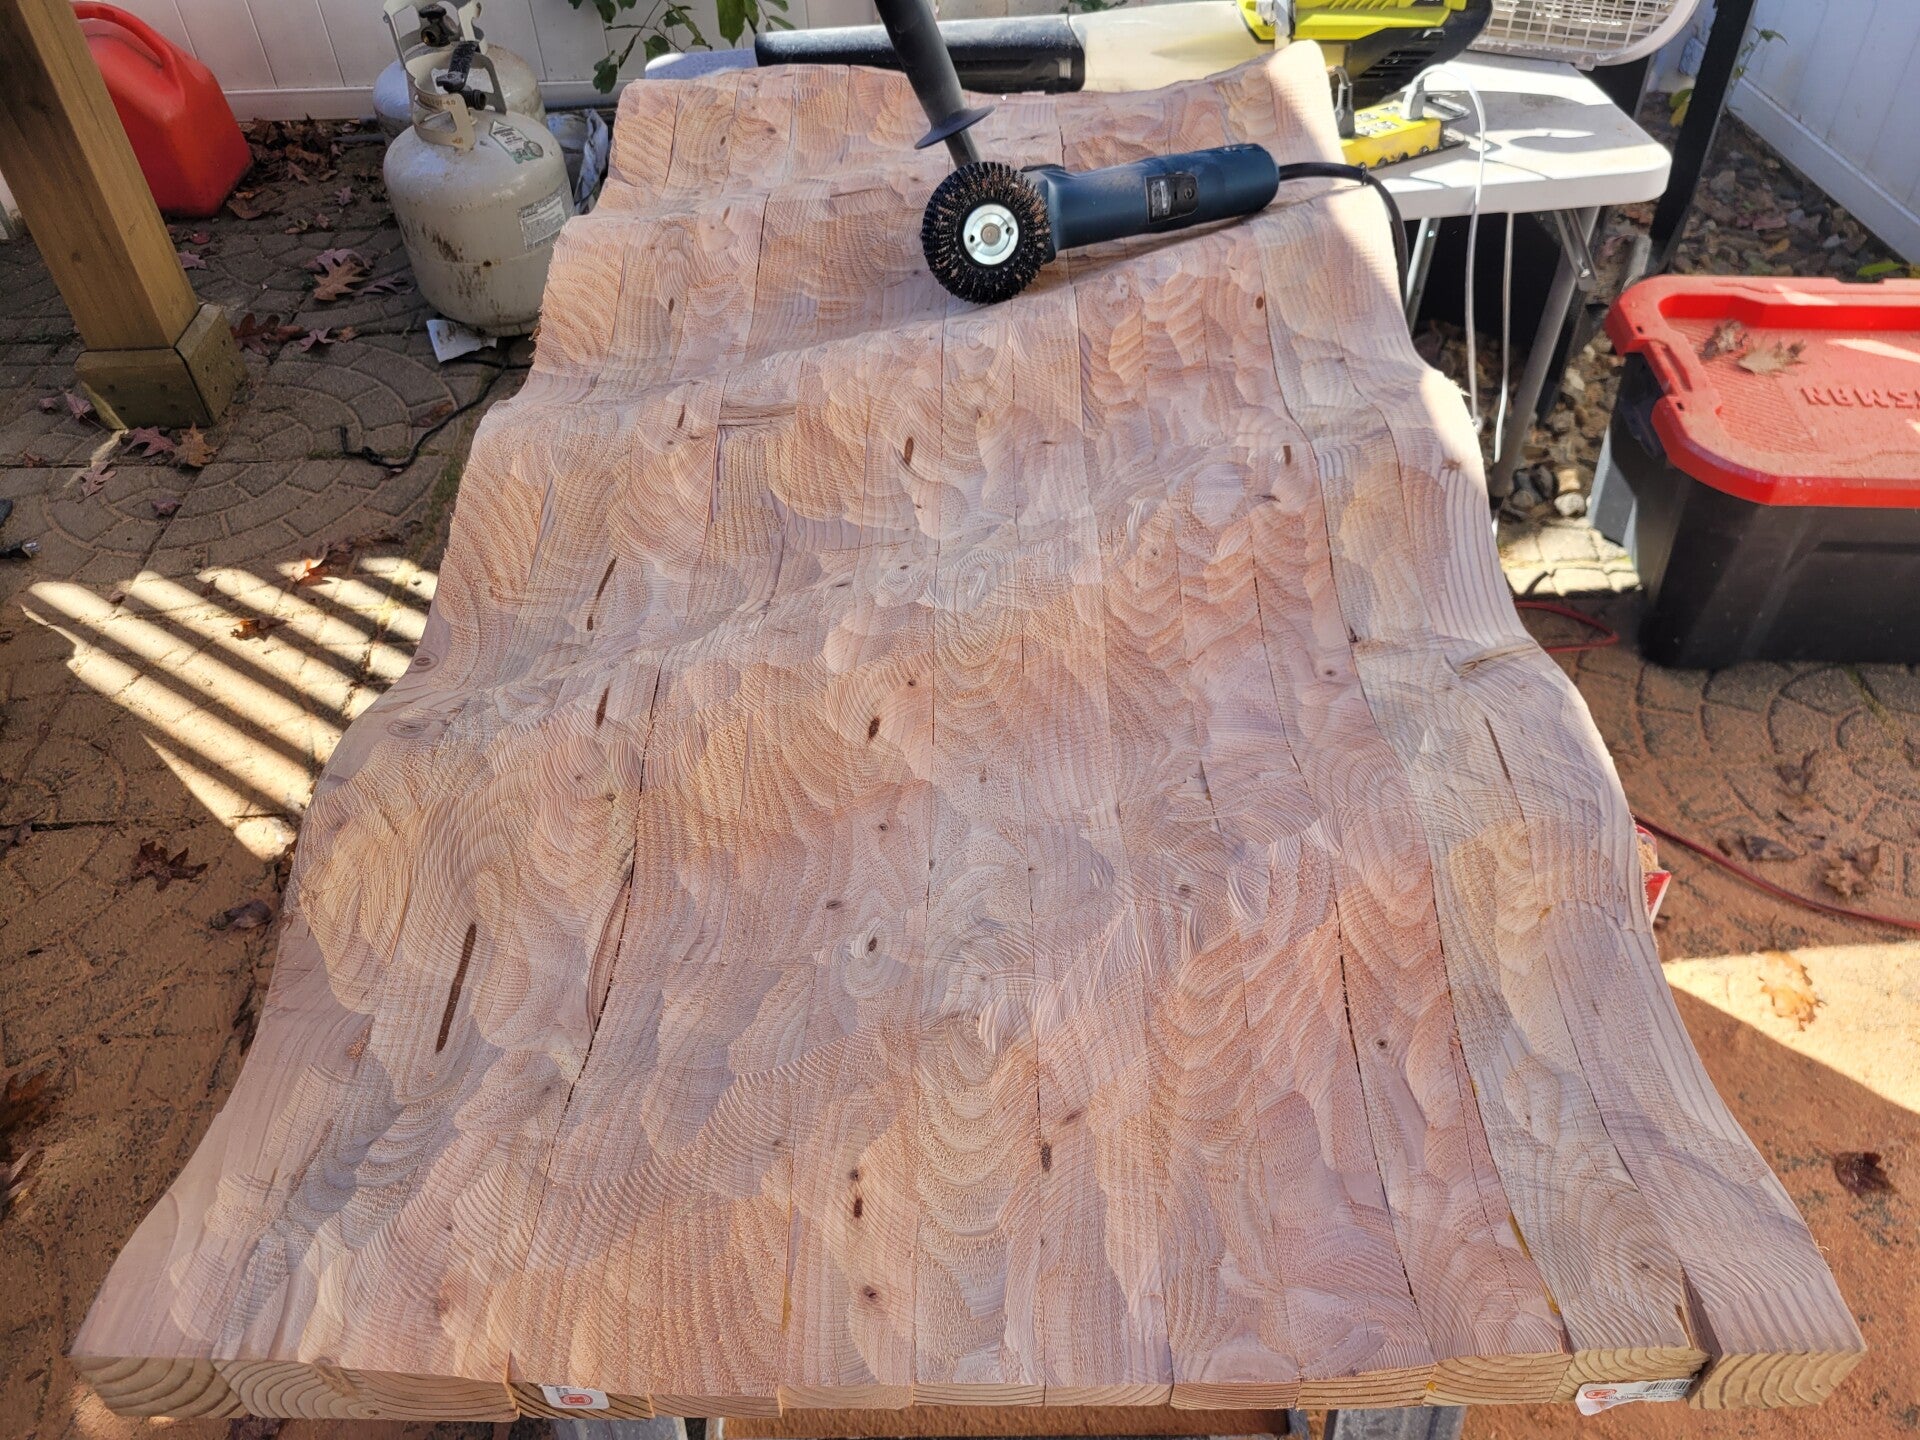
Sanding the Waves Smooth
After carving, each stripe goes through a detailed sanding process to remove tool marks and refine the curves. Multiple grits are used to achieve a flawless, glass‑smooth surface. This step is time‑intensive, but it’s what gives the flag its premium feel.
We sand:
-
By machine for the broad curves, using various sanders and grit pads
-
By hand for the tight transitions where the tools can't access
-
Through multiple grits for a flawless surface, to give a ready to go flag shape
This is one of the most time‑consuming steps, but it’s what gives the flag its premium feel.
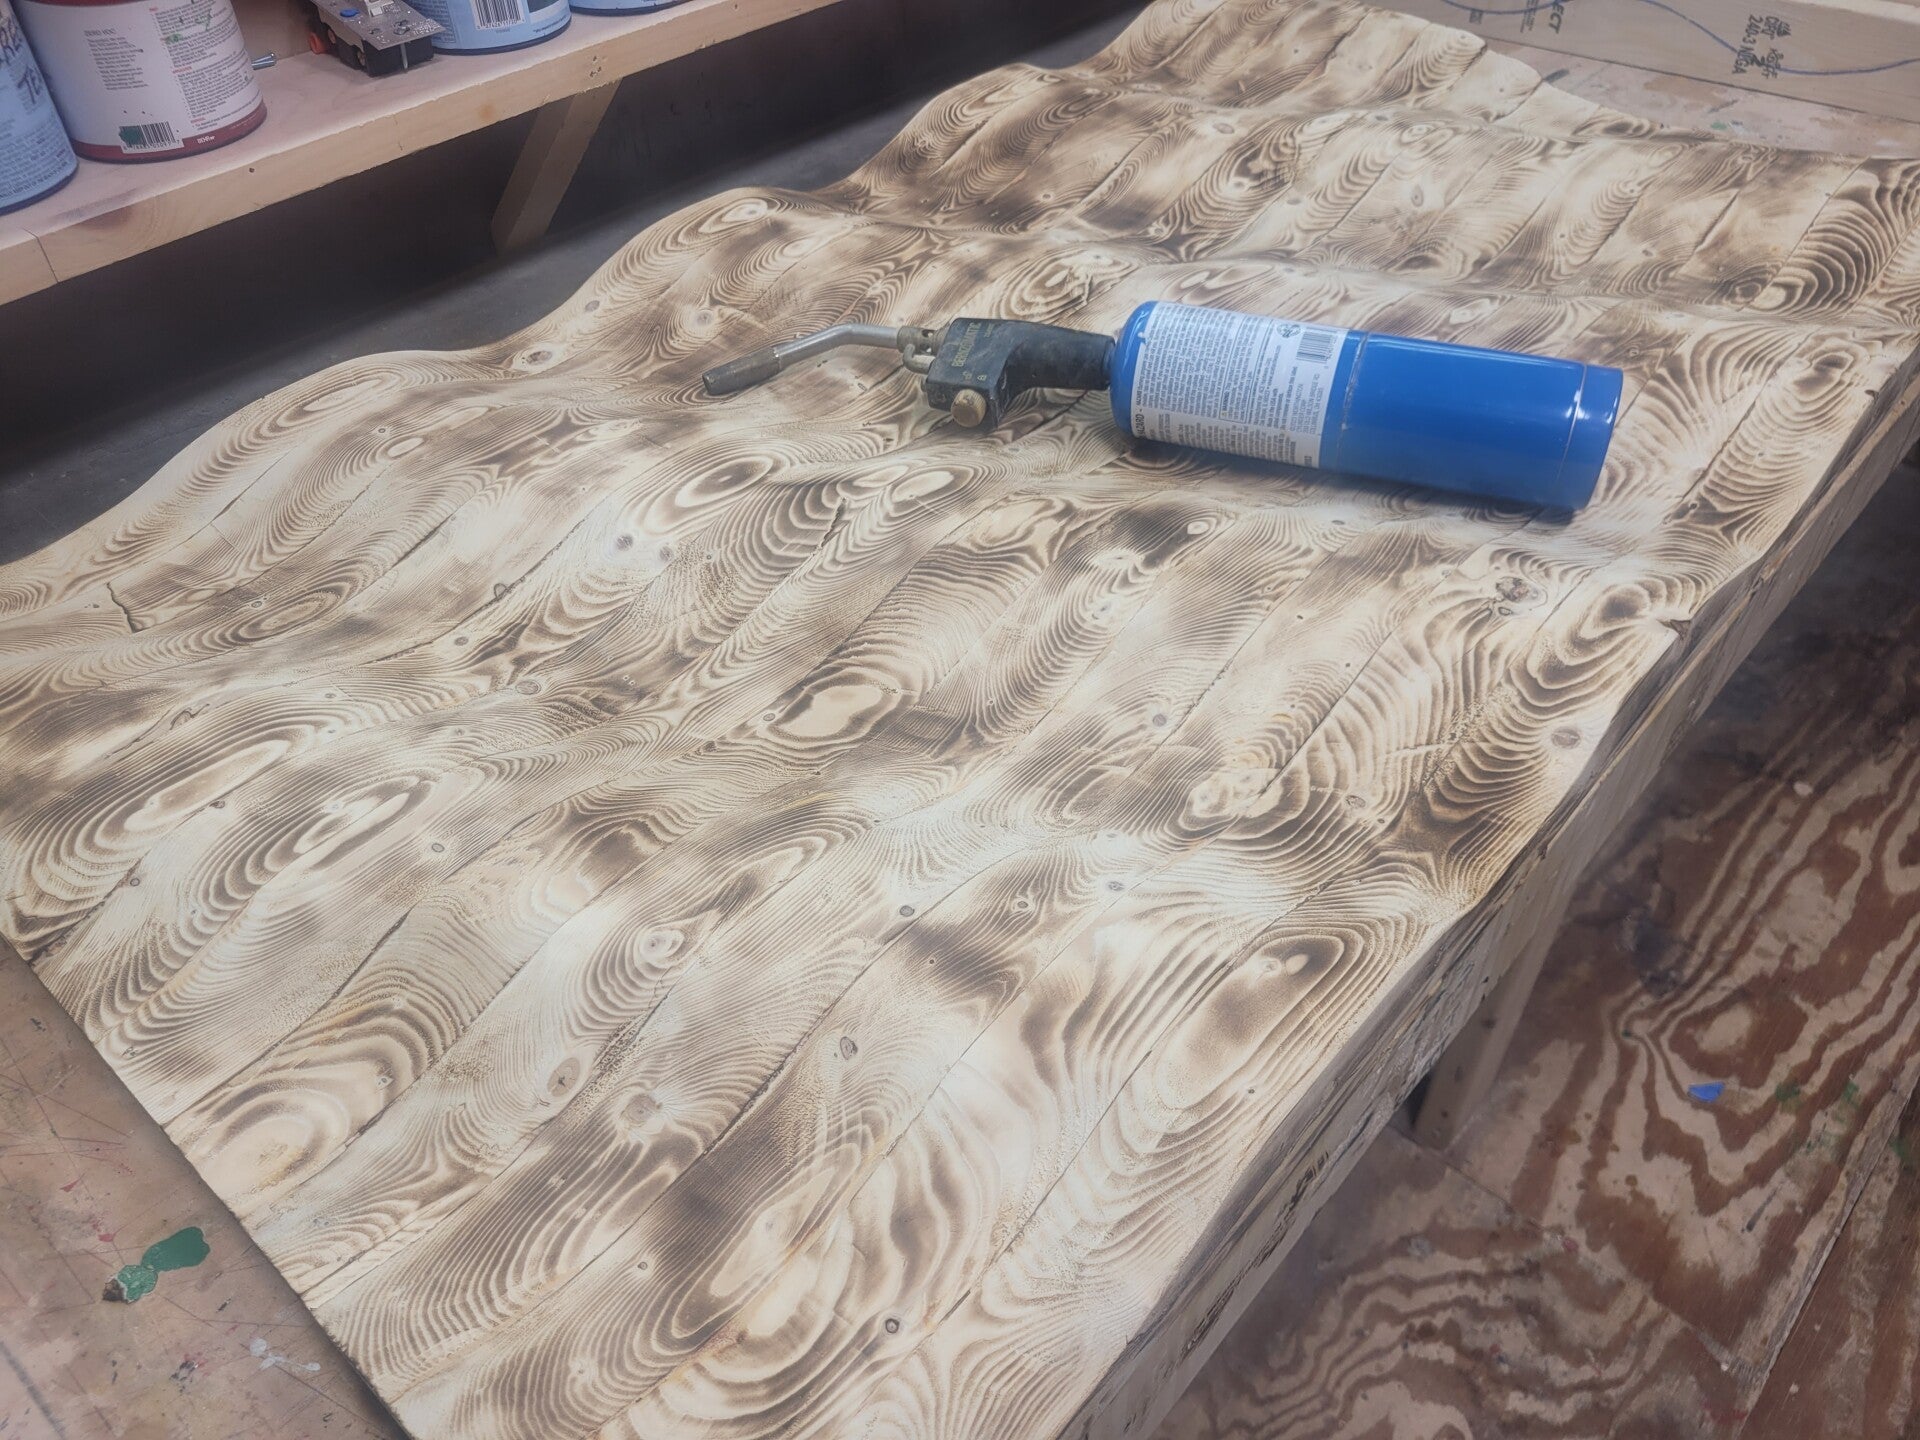
Burning and Shading
Controlled torching adds depth, contrast, and character to the carved waves. The grain patterns darken and come forward, creating a dramatic, handcrafted look. When done correctly, this step enhances the movement and texture of the entire flag.
-
Highlight grain patterns throughout the flag
-
Add depth to the waves
-
Create contrast between stripes
Burning is done slowly and intentionally — too much heat can ruin the wood; too little won’t bring out the character.

Painting or Staining the Stripes
Each stripe is finished individually to create rich color and dimension before assembly. Whether using bold colors, natural stains, or custom tones, the carved waves catch the light differently once coated. This step defines the overall personality of the flag.
-
Deep navy blues
-
Bold reds
-
Natural stains
-
Specialty colors for custom orders
This step sets the tone for the entire flag, giving each stripe its own depth and character before final assembly.
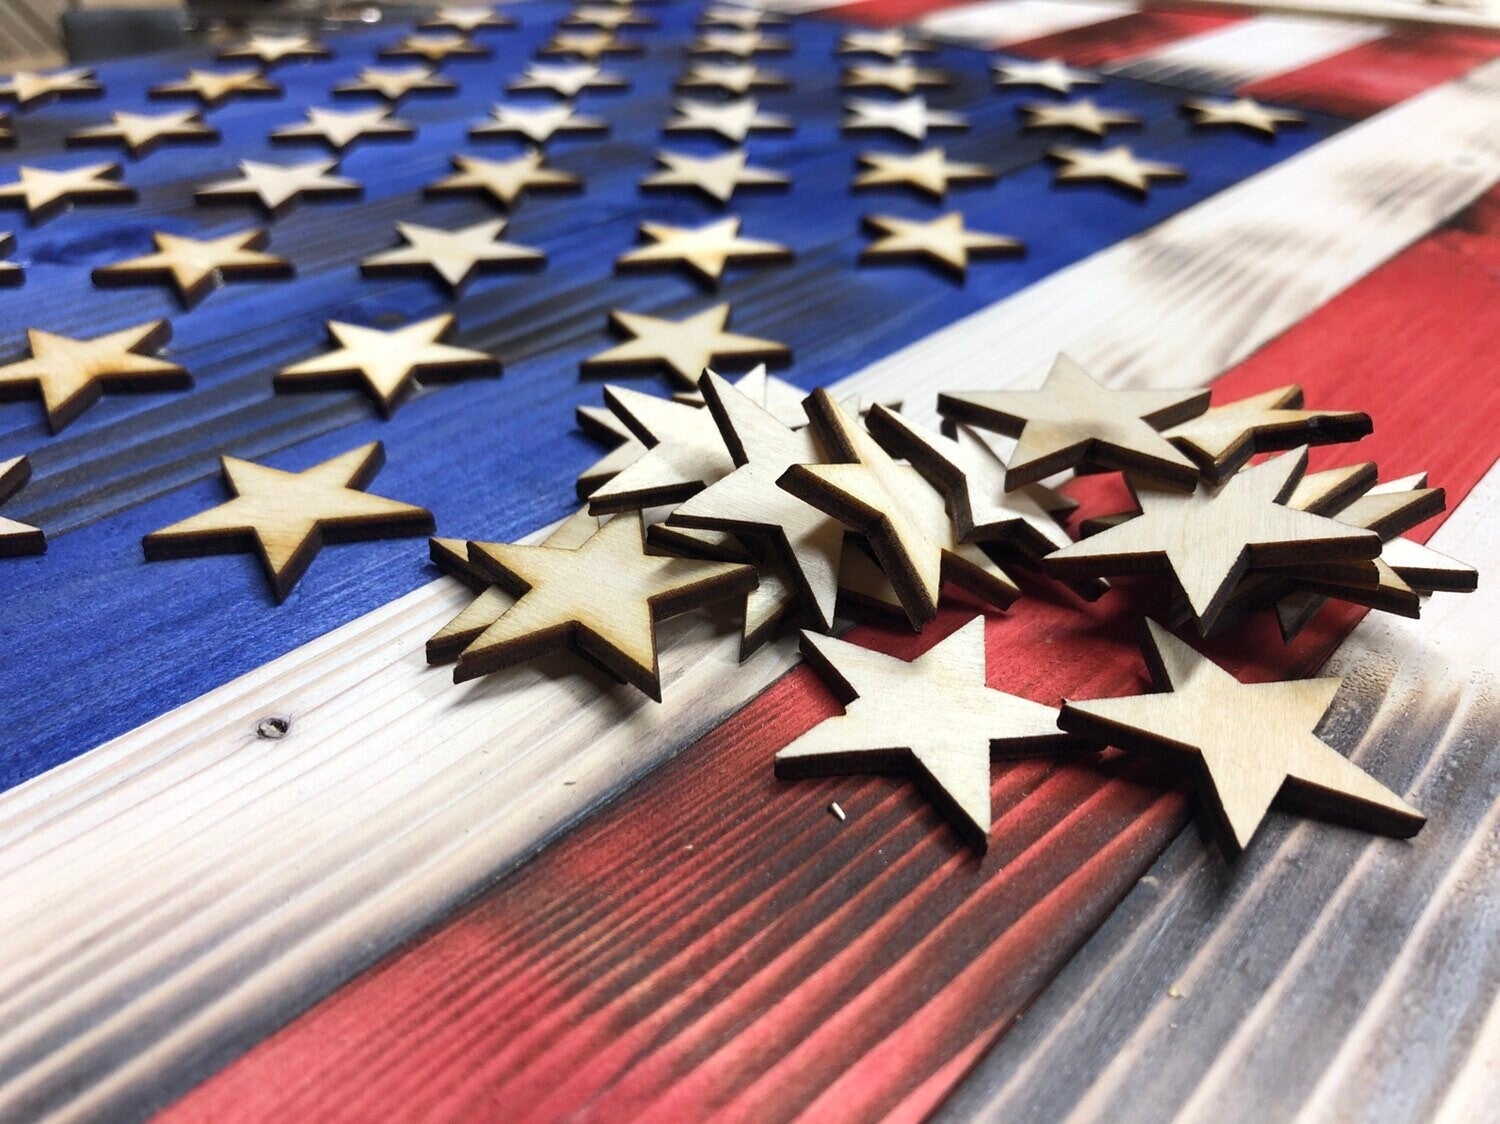
Adding Stars or Custom Elements
Stars, logos, and custom details are added with precision to match the design of each flag. Whether CNC‑cut stars, vinyl stars, or department patches, these elements give the piece its identity. This is where personalization and craftsmanship meet.
-
CNC‑cut wooden stars to raise the stars off the union and give a 3-dimensional look
-
Premium vinyl stars and attached to the union
-
Logos, department patches, or lettering are added to flag using premium vinyl
If you're looking for a custom flag with logos, department patches or lettering, visit our Custom Orders page.
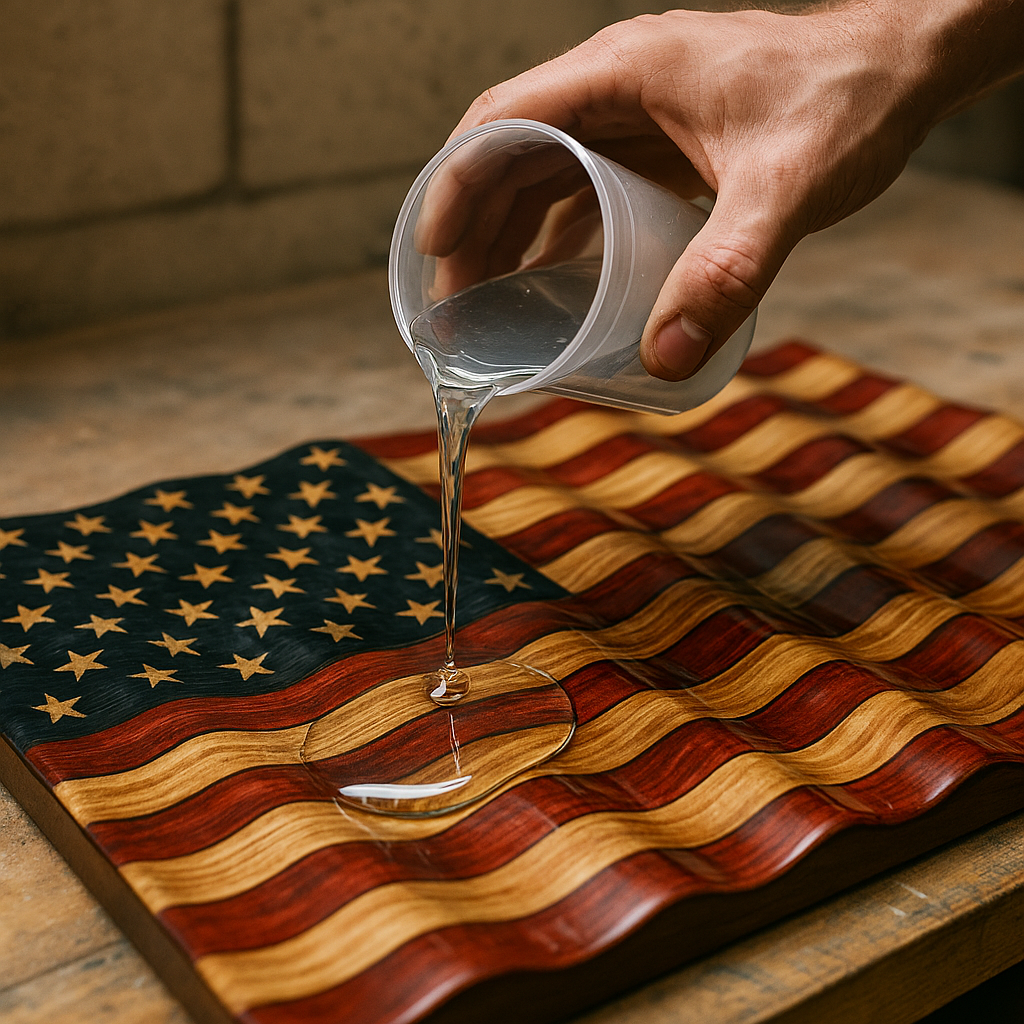
Applying the Final Finish
A protective topcoat seals the wood, enhances the colors, and brings out the depth of the carved waves. Depending on the design, different finishes are used to achieve the right sheen and durability. This final layer ensures the flag looks stunning for years to come. We use:
-
Polyurethane
-
Lacquer
-
Epoxy for a high‑gloss, glass‑like finish
This final step brings out the depth of the waves and protects the flag from moisture and UV exposure.
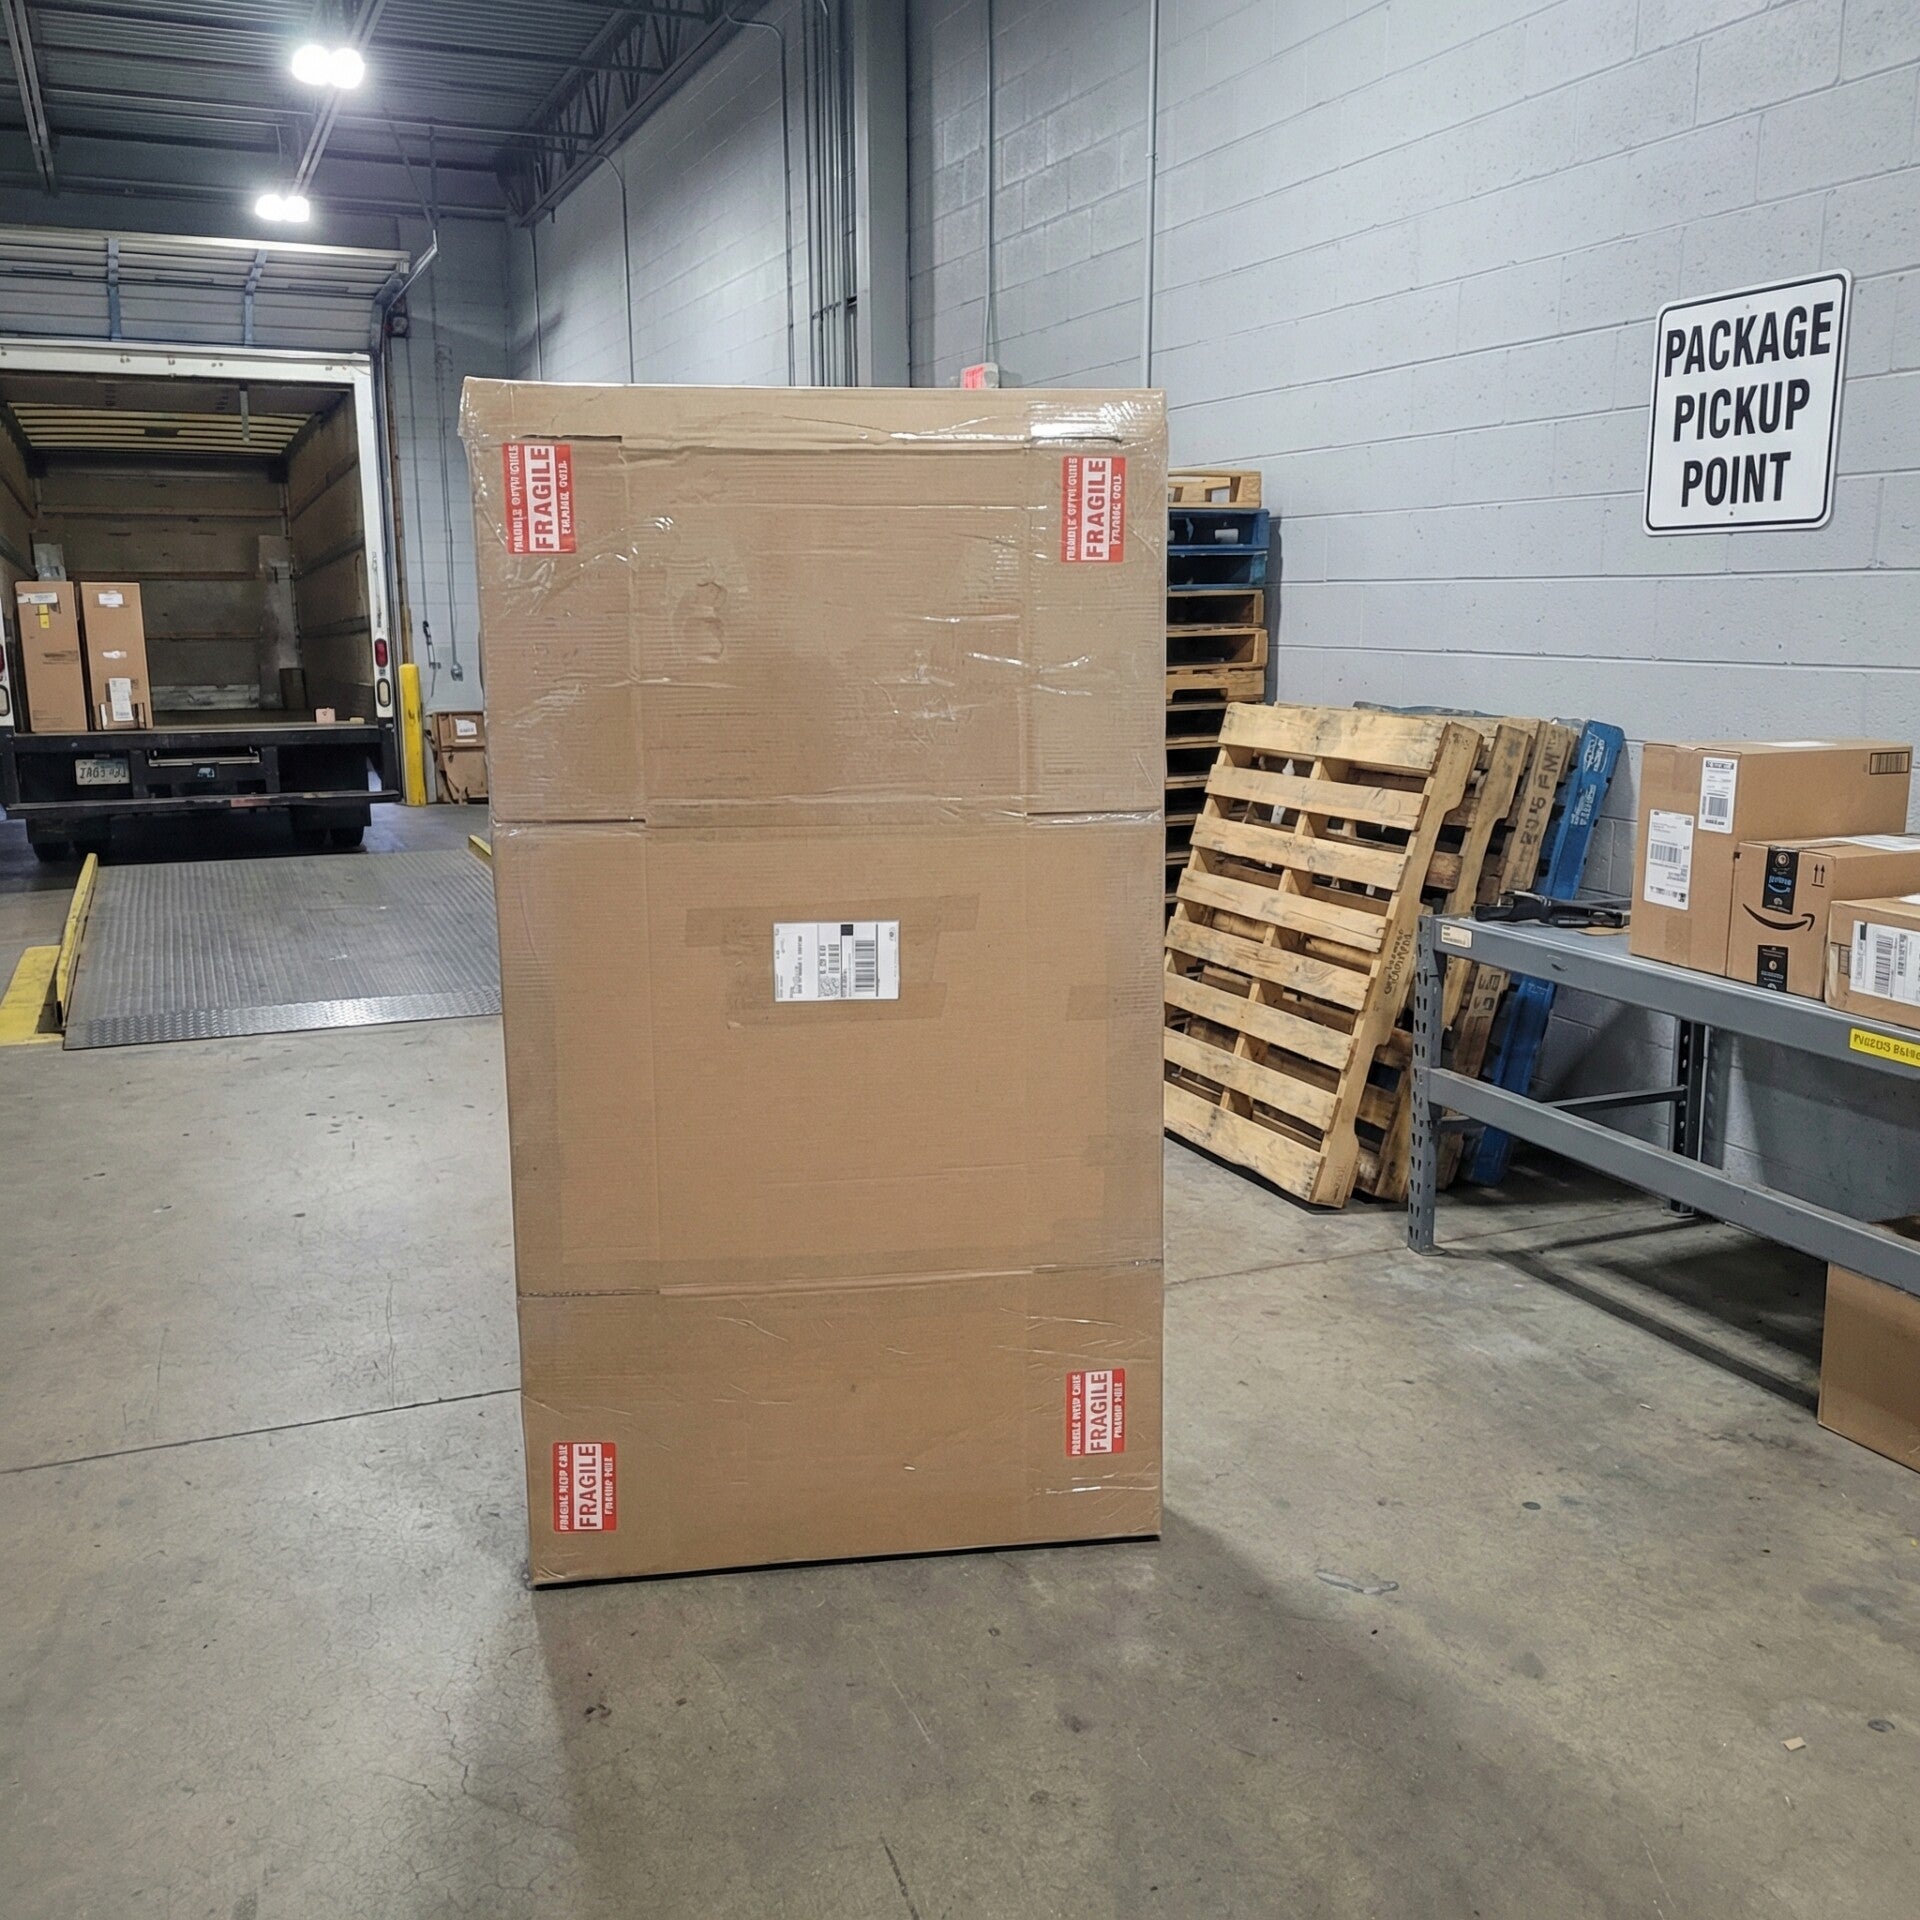
Adding Hardware and Preparing for Display
The last step is adding heavy‑duty hanging hardware, so the flag is ready for the wall. Each piece is inspected, cleaned, and prepared for delivery. Each flag is carefully packaged in a box and wrapped in bubble wrap ready for shipping. This ensures your flag arrives safely and ready to hang the moment it’s unboxed.

Why Wavy Wooden Flags Stand Out
Wavy flags aren’t just décor — they’re handcrafted art. The combination of carving, color, grain, and movement creates a piece that feels alive on the wall. No two are ever the same, and each one carries the mark of the craftsman who built it.
Ready to order your own handcrafted wavy flag? Explore our full collection of Wavy Wooden Flags.